Pay in installments of $6.67 with
![]() ,
,
![]() and
and
![]()
Shipping Estimate
USA
- USA
- CAN
- USA
- CAN
Ships within 48 hours · Estimated delivery Jul 3 - Jul 8
For Your Every Summer RSVP, with Code: SUMMER15
Description
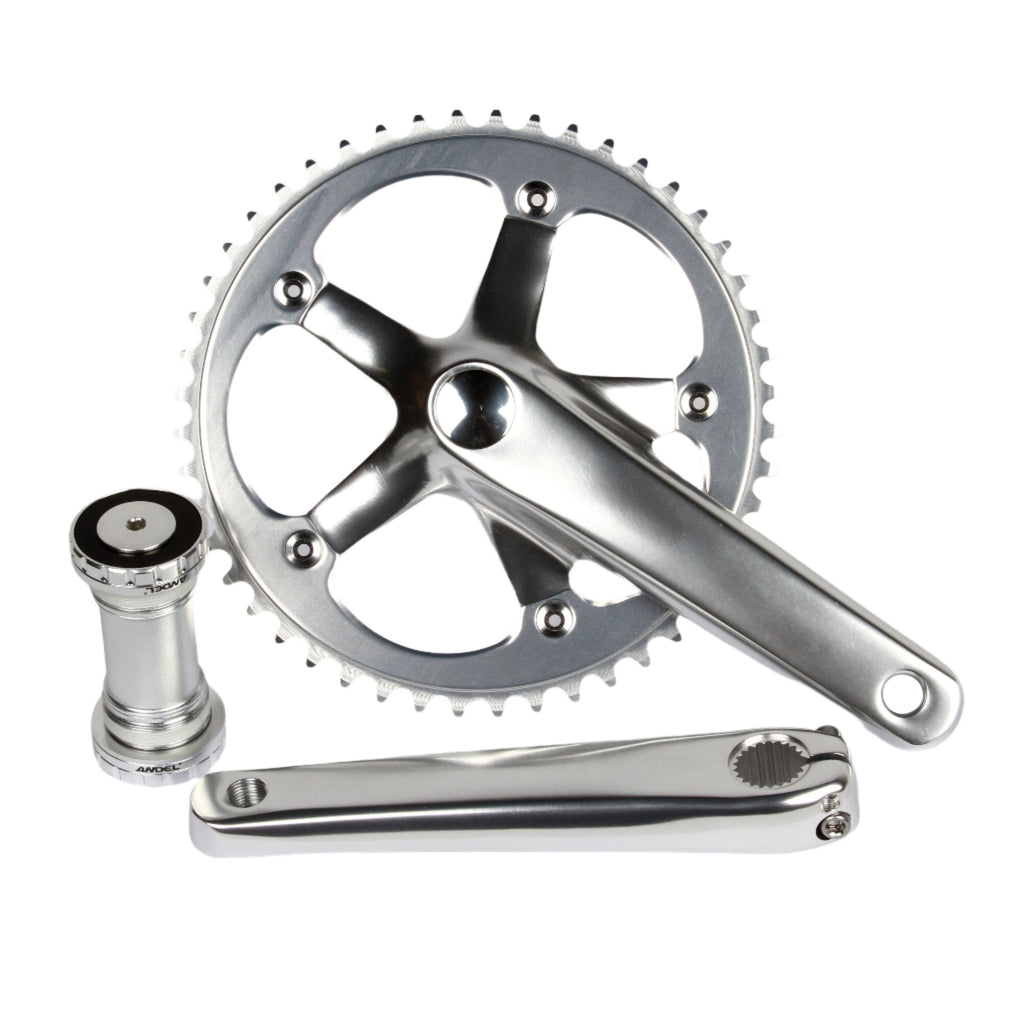
best crankset fixed gear Andel Deluxe Track fixed gear crankset w/ bottom bracketThis updated version of the Andel Deluxe features 6061 T6 arms, stiff integrated 24mm hollow cromo steel axle, a smartly refined 48t x 1 8" 144mm bcd chainring and includes a sealed cartridge bearing outboard bearing Hollowtech II type bottom bracket. Available in 165mm or 170mm lengths with an all black or polished silver finish. Unlike a GXP track crankset (like Sram Omnium), Andel Deluxe cranksets can easily be adjusted from side to side using
This updated version of the Andel Deluxe features 6061-T6 arms, stiff integrated 24mm hollow cromo steel axle, a smartly refined 48t x 1/8" 144mm bcd chainring and includes a sealed cartridge bearing outboard bearing Hollowtech II-type bottom bracket.
Available in 165mm or 170mm lengths with an all black or polished silver finish.
ⓘ Unlike a GXP track crankset (like Sram Omnium), Andel Deluxe cranksets can easily be adjusted from side-to-side using bottom bracket spacers to dial in chainline and overcome clearance issues.
Specifications
• 144mm bcd
• crank arms: cold forged 6061-T6 aluminum
• chainring: 48t 7075-T6 aluminum
• chain compatibility: 1/8"
• bottom bracket: 68mm English threaded (1.370" x 24tpi), external bearing
• cups install using Park Tool BBT-19.2
• includes two 1mm bottom bracket spacers (these are not required and depend on your application)
• length: 165mm, 170mm
• colors: all black, polished silver
• weight: 960g (165mm w/ BB)
Installation instructions
Hollowtech II-style cranksets are very easy to install, following this procedure:
- Apply grease to the bottom bracket threads and bottom bracket shell threads, and install the bearing cups to 5-50 Nm {305 - 435 in. lbs}
- Apply a thin coat of grease to the crank axle, and slide it through both bearing cups.
- Apply grease to the splined crank arm interface and pressure bolt threads, and install the left arm using the pressure bolt. The pressure bolt should only be tightened enough to remove side-to-side play in the crankset. Overtightening will cause the left side bearing (or both bearings) to bind, preventing the crank from spinning freely. If increasing drive side crank arm or chainring clearance is required, disassemble and reinstall using the appropriate spacer(s) between the drive side cup and BB shell.
- Tighten the two pinch bolts, back and forth, until 12-15 Nm {88 to 132 in. lbs.} is reached.
ⓘ Please note, you will want to re-check the torque of the pinch bolts after riding a few times to ensure they remain secure.
Shipping Notes
- Free Standard Shipping on $100+ Orders to the USA.
- Except Preorder products are shipped in 48 hours.
- Delivery to the USA:
- Standard Shipping : 3-10 business days
- If time is of the essence, please consider selecting expedited delivery for faster service.
Exchange/Return Notes
- We offer a 30-day return/exchange service after receiving.
- Final sale items are not eligible for returns or exchanges.
- To process your return/exchange, please contact us at [email protected]
- Please click here for more details>>> Return & Exchange Policy